Want a beautiful, long-lasting patio made from paving stones? The secret is in the prep: leveling the ground and building a stable, well-drained base. Do that right and your patio will look great and resist sinking, shifting, and frost damage for years. This guide walks you through the four main steps, site check, excavation, subgrade prep, and base build, plus the finishing touches most DIYers skip.
Proper ground leveling is necessary foundation for your patio stones, much like building a house on solid ground. When you level the surface correctly, you create a stable base that prevents your patio stones from rocking, shifting, or becoming loose over time.
Uneven ground can lead to multiple problems that affect both safety and aesthetics. Your patio stones might develop unsightly gaps, create dangerous tripping hazards, or collect water in low spots. This pooling water can cause further issues, especially in freeze-thaw cycles.
A well-leveled patio base extends the life of your patio and ensures it remains both beautiful and functional.
Before you grab that shovel to level the ground for pavers, there’s one step you can’t skip – calling your local utility service. Simply call your local utility-locating service to have underground lines marked, keeping you safe while you excavate your patio area.
Think about what lies beneath, water pipes, gas lines, and electrical cables crisscross under your yard like a hidden spider web. One wrong dig could lead to dangerous situations and expensive repairs. Utility locators will mark these lines with different colored paint or flags, showing you exactly where not to dig.
Taking this safety step is just as important as having the right tools and materials for your paver project. Once you know where it’s safe to dig, you can confidently move forward with your ground preparation steps. Remember to document these markings with photos for future reference.
Before paver installation, proper slope is necessary for water drainage. The industry standard requires a quarter-inch drop per foot away from your house, which helps prevent water from pooling or flowing toward your foundation. For example, if your patio extends 10 feet from your home, plan for a total drop of 2.5 inches.
To level the ground properly, you will need to consider the total depth needed for your paver installation. For a standard patio, excavate 6-8 inches deep to accommodate all layers. This includes 4-6 inches for the gravel base, a 1-inch layer of sand, and space for the paving stones themselves.
Living in a cold climate or planning heavy traffic? Your base material needs extra attention. Consider digging 8-12 inches deep to allow for a thicker gravel base. This deeper foundation helps prevent frost heave in winter and ensures your outdoor space stays level through seasonal changes.
Use a plate compactor on each layer as you build up your base. Start by marking your stakes and using a string line to maintain consistent slope. Remember to rake and tamper each layer carefully, this attention to detail will reward you with a long-lasting patio paver surface.
To build a French drain, you will need materials like perforated pipe, gravel, and drainage fabric. The gravel helps filter water into the pipe while supporting the trench structure. The fabric prevents soil from clogging the system, ensuring that water flows freely. These components work together to create a drainage system that effectively handles excess water.
Position your string line to show where the final patio surface will be. Begin at the house wall and adjust your string with a level, ensuring it slopes away from the building at a quarter-inch per foot. This gentle slope is vital for proper drainage and will prevent water from pooling or flowing toward your foundation.
Begin excavation by removing all existing material to your calculated depth below the string line. Remove every bit of grass, topsoil, roots, and organic matter, these materials will decompose over time and cause settling issues. Keep digging until you reach firm, stable subsoil that will provide a solid foundation.
Smooth out the excavated area using a rake and shovel to create an even surface. Pay special attention to maintaining the proper slope as you level. This step creates the foundation for your entire patio, so take your time to get it right. A flat, well-prepared subgrade will make the rest of your installation much easier.
The foundation of a successful stone paver patio installation is in proper subgrade compaction. After excavation, use a plate compactor to thoroughly compress the exposed soil. This creates a solid platform that will support all the layers above it and prevent future settling issues.
Before compacting, check the moisture content of your soil. If it’s too dry, lightly spray the area with water. The soil should be damp enough to hold its shape when squeezed in your hand, but not so wet that it becomes muddy or sticky. This optimal moisture level ensures maximum compaction.
Make multiple passes with the plate compactor, working in a systematic pattern across the entire area. You will know the subgrade is properly compacted when it feels firm underfoot and maintains its shape. This stable foundation is crucial for preventing future patio problems like shifting or sinking.
Why spend your weekend digging, raking, and compacting when you can have a perfect patio done for you? At Atlantic Hardscape and Concrete, we specialize in creating beautifully leveled patios that last for years. Our team handles everything, from precise ground preparation to expert paver and concrete patio installation, ensuring flawless drainage and a smooth, even surface. Skip the backbreaking DIY work and let our professionals bring your idea to life.
Contact us to schedule your consultation and enjoy a stunning, maintenance friendly patio built right here in Fredericton!
Normaly, you should dig about 6–8 inches deep. This depth allows room for the gravel base, sand layer, and the thickness of the stones.
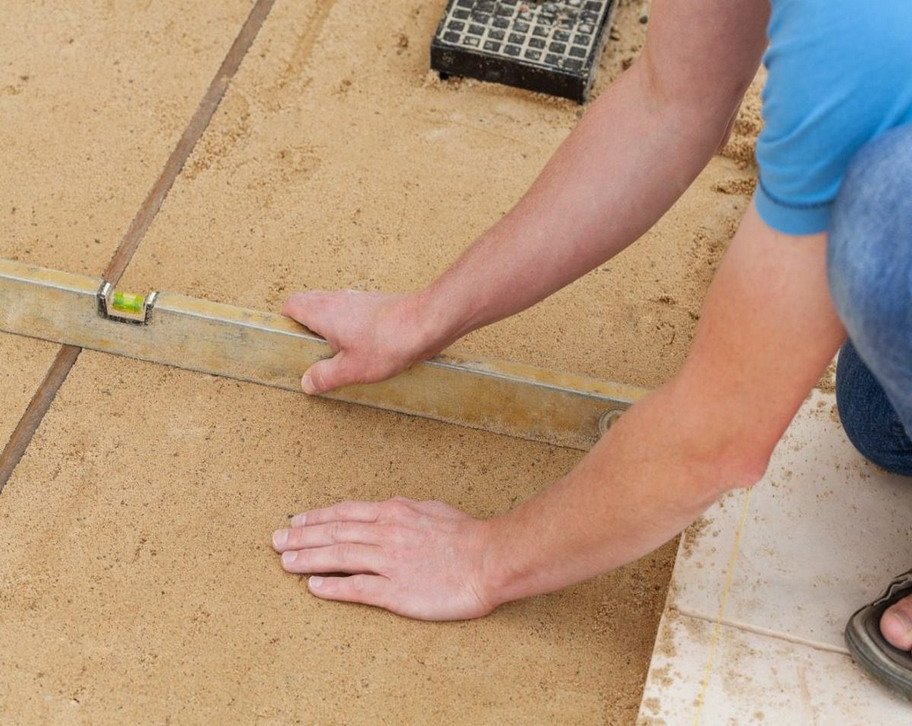
Use a long straight board and a level tool. Lay the board across the area and adjust the surface until the bubble in the level is centered.
You can level a small patio area yourself with the right tools and patience. For larger or sloped areas, hiring hardscaping professionals ensures better results and saves time.
Laying patio stones directly on soil is not recommended, as soil can shift and cause uneven surfaces over time. You must create a stable foundation by adding layers of gravel and compacted base material.
GET STARTED
Your dream space is within reach as we work together from detailed 3-D designs to the final custom build. Our process is both professional and exciting, and we look forward to taking this journey with you.
Contact
34 Jackstraw Court, Fredericton, NB, Canada, New Brunswick
