To protect retaining walls from snow plows, plan the equipment route, mark vulnerable edges, keep snow piles away, and guide meltwater away from the wall. The right approach depends on the wall’s condition, its distance from the clearing route, and the room available for equipment.
A plow can chip a wall or garden edging, but contact is not the only risk. Compacted snow, blocked drainage, ice, and de-icing products can also affect nearby hardscape and planting.
Before winter, check the wall and map the site while its edges remain visible. Then share clear instructions with anyone who clears the property, and inspect the area again after major storms and spring thaw. Keep a record of the wall’s condition so you can tell whether a change is new.
For homeowners and property managers in Fredericton and nearby communities, a practical plan can reduce avoidable damage without disrupting routine snow removal. The plan should suit the property and the equipment being used, rather than relying on one method for every wall or driveway.
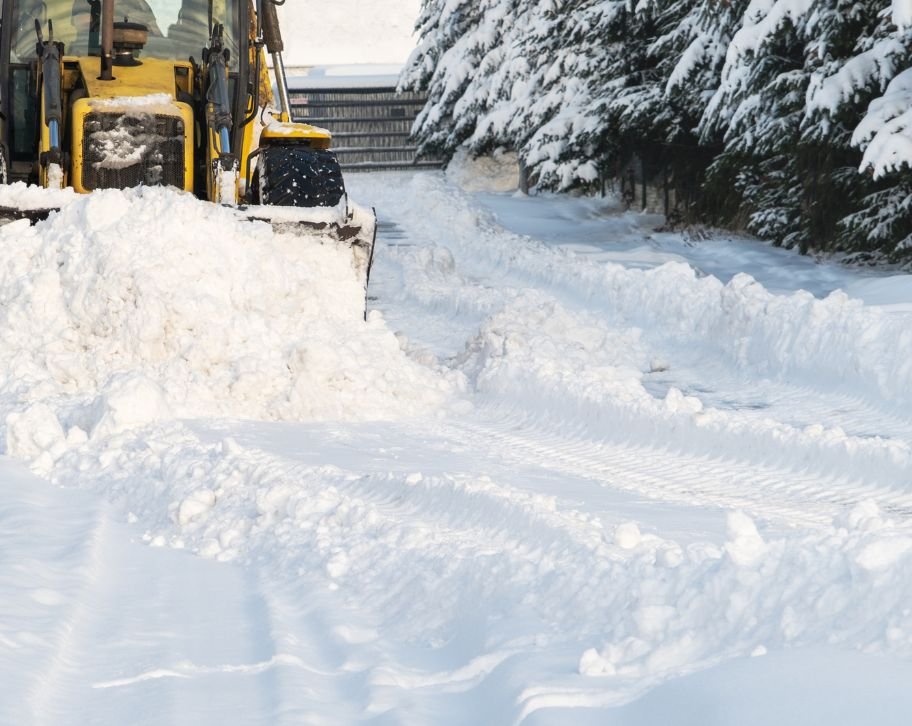
Snow plows can damage retaining walls through direct contact, piled snow, and changes to nearby water flow. The level of risk depends on the wall’s location, materials, condition, drainage, and exposure to equipment. A narrow driveway can bring a blade or vehicle close to a wall, while a parking lot may see repeated passes by larger machines. Planning for each risk helps protect retaining walls from snow plows and limit harm to nearby garden edging.
Direct contact can chip a wall face, loosen a cap, or shift a block when a blade, bucket, wheel, or vehicle strikes it. Corners and wall ends are easy to miss during tight turns, especially after snow hides the edge. Repeated contact may worsen an existing crack or movement, even when each mark looks small. Compacted snow pushed against the wall can add pressure, while piles may hide damage until they melt; curbs, garden beds, and paving edges can also get hit.
Contact is not always obvious from the operator’s position. Snow can conceal the wall base and make it harder to judge how close a blade or tire is to the edge. Visibility may also be limited by darkness, falling snow, or snowbanks. A route that is easy to follow before winter may need closer attention once the property is covered.
Water held in soil can add pressure behind a wall, while freeze-thaw hardscape damage can affect nearby concrete, stone, and paving. Snowmelt may pool at the wall or carry de-icing products into joints, soil, and planting beds. Blocked outlets can make water harder to drain during a thaw, so retaining wall drainage requirements. Winter changes can have several causes, so do not assume every crack or shifted edge came from a plow.
Where water goes after it leaves the wall matters, too. A pile can redirect meltwater across a walkway or toward a low area beside the wall. Check the route water takes during a thaw, and note whether it reaches an outlet or collects near the wall. Avoid changing drainage around the wall without understanding where the water will flow.
Preparation makes the plow route easier to follow and helps identify vulnerable areas before snow covers them. Walk the property in autumn, when the wall, driveway edge, and drainage features are easy to see. Note where equipment turns, where snow may be pushed, and which parts of the property should stay clear. A plan to protect retaining walls from snow plows should cover the full route, not just the wall face.
Photograph the wall, corners, ends, nearby pavement, and visible drainage features before winter. Look for cracks, loose caps, shifted units, rebuild retaining wall, erosion, and water stains, then record what you find. Map equipment routes, turning points, restricted areas, and likely snow-storage spots, including areas used by contractors, staff, delivery vehicles, and household tools. If the settling retaining walls or shows major damage, ask a qualified professional to inspect it before regular clearing begins.
Include more than the wall in your record. Photograph nearby driveway edges, steps, garden beds, and drainage outlets that could be affected by the same equipment or runoff. Make a note of existing marks or areas that already collect water. These details give you a useful comparison after a storm and can help clarify whether a change appeared during the winter.
Place visible markers along the vulnerable wall run, driveway edge, corners, garden beds, and other features that equipment could hit, an approach consistent with guidance in a state Highway Maintenance Manual on marking features to prevent snow-clearing damage. Set them where operators can see them from the approach, and check that they remain above expected snow cover without creating hazards for people or vehicles. Markers show boundaries, but they do not stop a plow or replace a safe route. Share a sketch or written plan that shows travel paths, snow-storage areas, and restricted zones; on commercial sites, give every operator the same current instructions.
Before clearing starts, confirm that the person operating the equipment understands the route and where snow should go. If several people may clear the property, keep the directions consistent and easy to find. Update the plan if a marker is lost, a snow pile blocks visibility, or site conditions change. Clear directions reduce guesswork, but operators still need enough room to manoeuvre safely.
A safe route gives equipment room to snow plowing contracts work without using a wall as a guide or stopping point. Plan the direction of each pass, the turning space, and the final snow-storage location before the first storm. Equipment should suit the surface and the available clearance, rather than forcing a large machine into a tight area. Clear instructions can help protect retaining walls from snow plows while also reducing damage to paving and nearby property features.
Leave a practical buffer between the blade, machine, and wall; the needed space varies with equipment, visibility, and site layout, a principle echoed in avalanche and snow protection engineering such as avalanche protection structure design used to keep structures clear of accumulating snow and debris loads. Never push a blade against the wall or use a cap as a stopping point, and avoid tight turns beside vulnerable corners. Plan each pass so snow does not build up against the wall or its ends. If the route is too tight, use a different approach, smaller equipment, or safe snow shoveling for the last strip, while accounting for backing and poor visibility.
Think through where the machine will turn and reverse before clearing begins. A route that works for a straight pass may leave too little room at a driveway entrance or wall corner. If the operator cannot see the wall edge, do not rely on the marker alone to judge clearance. Consider leaving the final narrow strip for a slower method that allows better control.
Rubber-edged blades may reduce gouging on some pavers shift or sink, but they do not make contact with a wall safe. Smaller equipment or a snow blower may suit a confined area, depending on the site and snow conditions. Operators should set blade height and pressure to avoid scraping pavement, curbs, or decorative finishes. Avoid metal tools on concrete finishes guide, and choose equipment based on the surface, clearance, snow volume, and operator control.
A snow plowing vs snow blowing can move snow beyond the cleared path, so decide where its discharge should go before use. Keep it away from walls, doors, walkways, and planting areas where buildup or drifting could cause another problem. Hand tools offer more control in a tight spot, but they can still chip caps or finished concrete if used carelessly. The right method depends on the operator’s ability to work within the available space.
Method | Where it may suit | Main caution |
|---|---|---|
Rubber-edged plow | Some driveways and pavers | Keep the blade clear of walls |
Snow blower | Some confined areas | Aim discharge away from walls and planting |
Hand tool | A narrow final strip | Avoid striking caps, blocks, or finished concrete |
Snow-storage choices can affect wall pressure, drainage, plants, and garden edging. Choose a location before winter that can hold expected accumulation without blocking access or sending meltwater toward the wall. Treated snow also needs care because runoff can carry de-icing products into soil and planting beds. Good placement is a practical way to protect retaining walls from snow plows even when the blade never touches them.
Research on blowing snow control, including a CFD-based parametric study on subgrade design, underscores why dedicated snow-storage planning matters, so do not treat a retaining wall as a snow-storage barrier or push repeated loads against it. Choose a spot away from sensitive planting, drainage routes, walkways, entrances, and protect pavers during snow removal. Keep outlets and channels accessible instead of covering them with snow or debris. Recheck pile size after major storms, since a useful early-season spot may fill; during a thaw, watch that meltwater does not flow toward the wall or adjoining property.
Consider how a pile will affect access as it grows. Snow placed near a driveway entrance can restrict sightlines, and a pile beside a walkway can make it harder to keep the route clear. If the planned storage area is filling up, adjust where later snow goes instead of pushing more against the wall. Do not redirect runoff toward a neighbouring property or an area where it can cause another hazard.
Use deice a concrete driveway only where needed for traction, follow label directions, and check that the product suits the surface. Atlantic Hardscape and Concrete advises considering calcium or magnesium chloride for concrete and using sand where it fits the site. Product choice and suitability can vary, so check the product label and the surface manufacturer’s guidance where available. sanding vs salting for ice, but it does not melt ice.
Keep salt-laden snow away from sensitive plants, and include lawn edges, garden beds, irrigation parts, and other property features in the clearing plan. Use only the amount of de-icer needed for the intended area, rather than spreading it broadly. When clearing treated snow, avoid piling it where runoff will pass through planting or collect beside the wall.
Inspect the wall and nearby hardscape after major clearing events and again after the spring thaw. Compare new marks with photographs from before winter, and note any changes in alignment, drainage, or surrounding property. A scrape does not prove that a wall has structural damage, but movement or repeated water problems deserve closer attention. Regular checks help protect retaining walls from snow plows by making new issues easier to spot and document.
Look for fresh chips, loose caps, shifted units, new cracks, drain tile issues, and snow pushed into restricted areas. Check nearby driveway edges, garden edging, turf, planting beds, and visible drainage outlets as well. If equipment strikes the wall, record the date and take photographs from a safe spot. In spring, compare those images with the pre-season record, note pooling, erosion, or salt damage, and do not move large wall units or hide cracks before the cause is understood.
Avoid inspecting right beside moving equipment or walking on an unstable snowbank to get a closer look. Take photographs from a safe position and note which part of the wall or nearby surface has changed. If the wall is still covered, wait until it can be seen clearly rather than digging around the face or base. Keep the notes with your winter clearing instructions for future reference.
Leaning, bulging, substantial cracks, displaced blocks, persistent water collection, or repeated plow contact are reasons to seek professional advice. A surface mark and structural movement are not the same, and the cause and repair needs vary by site. Atlantic Hardscape and Concrete offers retaining wall construction, maintenance, drainage work, and property preparation guidance. If the route cannot stay clear or the wall appears damaged, discuss the property with a qualified hardscape professional.
If you are unsure whether a change is cosmetic or indicates movement, avoid trying to reset blocks or fill cracks before the wall has been assessed. The right response depends on the wall’s construction and the cause of the change. Sharing your photographs, notes, and clearing plan can help a professional understand what happened and what should be checked next.
To protect retaining walls from snow plows, mark vulnerable edges, set a clear route, choose snow-storage areas carefully, and keep drainage paths open. Photograph the wall before winter, then check it after major storms and spring thaw. Adjust the plan to the wall’s condition, equipment, and available space. If you need help retaining wall on Fredericton property or planning work around it, contact Atlantic Hardscape and Concrete to discuss the property.
A deflector can change where snow moves, but it cannot stop a machine or blade from striking a wall. Its fit and safe use depend on the equipment and site. Keep a clear route and use a separate snow-storage plan.
Do not drill into or attach a barrier to the wall without knowing how it was built. A separate barrier needs suitable placement so it does not block drainage, access, or visibility. Ask a qualified professional if the wall faces repeated contact.
A wall’s capacity depends on its design, condition, and site loads. Do not assume it can safely hold stored snow. Ask a qualified professional to review the intended use, especially if the wall already shows cracks or movement.
Record the date, take clear photographs from a safe position, and note visible changes. Keep relevant messages with the snow-removal contractor. Contact your insurer to ask about policy-specific reporting steps before arranging repairs.
Coverage and reporting rules vary by insurer and policy. Photograph the damage, keep relevant records, and contact your insurer directly. Do not assume repair costs are covered until the insurer explains your policy.
GET STARTED
Your dream space is within reach as we work together from detailed 3-D designs to the final custom build. Our process is both professional and exciting, and we look forward to taking this journey with you.
Contact
34 Jackstraw Court, Fredericton, NB, Canada, New Brunswick
