A curved concrete walkway creates visual interest, guides visitors naturally through your landscape, and withstands freeze-thaw cycles when installed correctly. In Fredericton’s challenging climate, proper planning, sub-base preparation, and climate-adapted concrete mixes determine whether your path lasts decades or cracks within seasons. This guide covers design, installation, and finishing techniques for durable curved walkways.
Have you ever wondered why some properties instantly feel more inviting than others? What if the secret to transforming your outdoor space lies in the gentle curve of a well-designed walkway? Many homeowners believe that pouring concrete is straightforward, but are you aware of the critical mistakes that lead to cracked, uneven paths within just a few seasons?
A curved concrete walkway does more than connect two points. It creates visual interest, softens harsh architectural lines, and guides visitors through your landscape in a way that feels natural and welcoming. In Fredericton’s challenging climate, where freeze-thaw cycles can destroy poorly installed paths, understanding the right techniques isn’t optional.
This guide walks you through the planning, preparation, and installation steps for building a durable curved concrete walkway that withstands New Brunswick’s weather while improving your property’s curb appeal. You’ll learn what separates a walkway that lasts decades from one that cracks within a year.
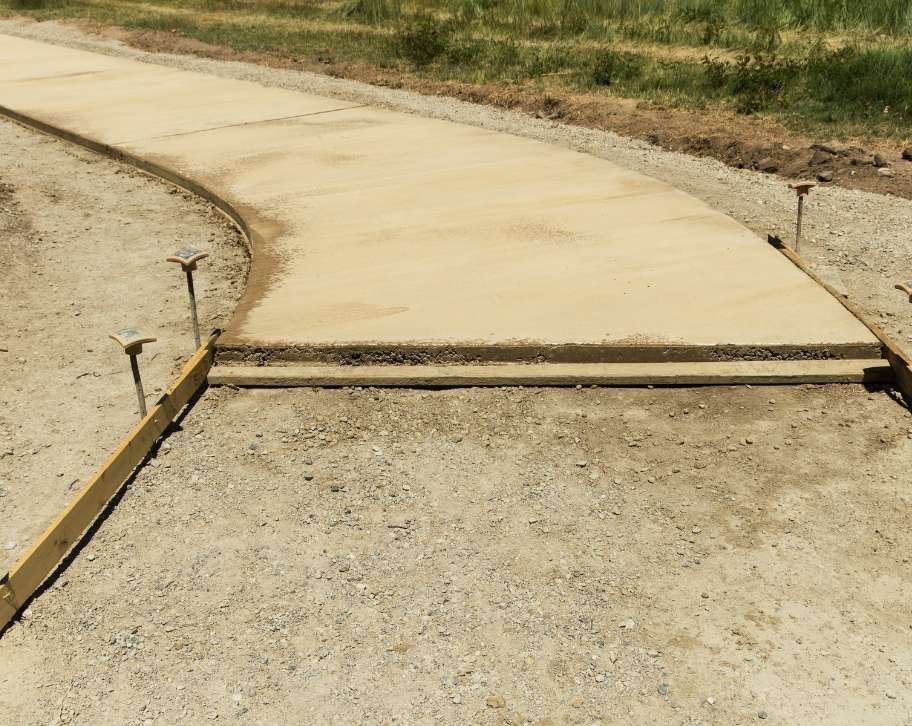
Before breaking ground, proper planning determines whether your curved walkway becomes a lasting feature or an expensive mistake. The design phase requires careful consideration of both aesthetic goals and functional requirements specific to your property.
Start by using a garden hose or heavy rope to mark your desired curve directly on the ground. Walk the path multiple times, adjusting the curve until it feels natural and complements existing landscape features like trees, garden beds, or architectural elements. This hands-on approach lets you visualize the flow before committing to excavation.
Width matters more than most homeowners realize. Front entrance paths typically need 36 to 48 inches of width to accommodate two people walking side by side comfortably. Garden paths can be narrower, but consider how you’ll use the space. Will you push a wheelbarrow along this route? Do you need room for snow removal equipment in winter?
Drainage patterns deserve serious attention during planning. Observe how water moves across your property during rainfall. Your curved path should direct water away from building foundations, not toward them. In Fredericton’s clay-heavy soils, poor drainage planning leads to frost heaving that destroys concrete within a few seasons.
Before excavating, contact local utility services to mark underground lines. This step prevents dangerous accidents and costly repairs. Once utilities are marked, you can finalize your curve’s exact position.
Consider these depth requirements carefully:
Total excavation depth: 8 to 10 inches below finished grade
Compacted granular base: 4 to 6 inches
Concrete thickness: 4 inches minimum
The decorative finish you choose affects both appearance and budget. Broom finishes provide slip resistance for winter safety. Exposed aggregate creates texture and visual interest. Stamped patterns mimic natural stone but require professional expertise to execute properly. Select your finish based on the walkway’s purpose, your aesthetic preferences, and maintenance willingness.
Think about how your curved path integrates with existing hardscape elements. Does it connect to a driveway, patio, or deck? Smooth transitions between different surfaces create a cohesive outdoor space that feels intentionally designed rather than pieced together.
The sub-base determines whether your curved walkway survives Fredericton’s winters or becomes a cracked, heaving mess. This step cannot be rushed or skipped without serious consequences.
Begin excavation along your marked curve, maintaining consistent width throughout. Dig to your planned depth of 8 to 10 inches below the finished grade. Remove all organic material, roots, and loose soil. These materials decompose over time, creating voids that allow the concrete to settle unevenly.
Install your granular base next. Use 3/4-inch minus 3/4-inch minus clear stone or crusher run, spreading it in layers no thicker than 2 inches at a time. Compact each layer thoroughly with a plate compactor before adding the next. This process creates a stable, load-bearing foundation that channels water away from the concrete slab above.
Proper compaction makes the difference between a walkway that lasts 20 years and one that fails in three. The compacted base should feel rock-solid underfoot. If you can easily push a screwdriver into the surface, you haven’t compacted enough.
Grade the base to create a 1 to 2 percent cross-slope. Water must shed off the walkway surface to the sides, not pool in the curve’s belly where it freezes and causes damage.
Forming curved sections requires specialized materials. Rigid lumber creates kinked, segmented curves that look amateur. Instead, use:
Thin plywood strips (1/4 inch thickness)
Hardboard panels
Specialized plastic concrete forms designed for curves
These materials bend smoothly without breaking, creating the continuous arc that defines a professional installation. Stake your forms every 12 to 18 inches along the curve. Wet concrete weighs approximately 150 pounds per cubic foot and generates tremendous outward pressure. Inadequate staking allows forms to bow outward, ruining your carefully planned curve.
Set forms to the correct height, accounting for your planned cross-slope. Double-check that forms create a smooth, continuous arc without flat spots or sharp angles. Walk the inside of the forms, looking down the length of the curve from multiple angles. Any irregularities become permanent once concrete is poured.
Install rebar or wire mesh reinforcement before pouring. Position reinforcement in the center of the slab’s depth for maximum tensile strength. In curved sections, this reinforcement prevents cracking along the stress points where the curve changes direction.
The concrete mixture you choose directly impacts how well your walkway survives Atlantic Canada’s climate. Standard mixes fail quickly in freeze-thaw conditions. Specify a minimum 32 MPa (4000 psi) compressive strength mix with air-entrainment admixtures.
Air-entrainment creates microscopic bubbles throughout the concrete. These bubbles provide space for internal moisture to expand when it freezes, preventing the surface scaling and spalling that destroys unprotected concrete during winter.
Pour concrete into your prepared forms, working from one end to the other. Distribute the mix evenly throughout the curve, eliminating air pockets by working a shovel or vibrator through the wet concrete. Overfilling slightly allows you to screed the surface level with the forms.
Use a screed board to level the surface, following the curve of your forms. This step requires two people for curved sections. Work the screed in a sawing motion while pulling it along the forms, filling low spots and removing excess concrete.
Timing becomes critical during finishing. Wait until bleed water evaporates from the surface before beginning finish work. Starting too early weakens the surface. Waiting too long makes finishing difficult or impossible.
Apply your chosen finish once the surface is ready. For broom finishes, drag a stiff-bristled broom across the surface perpendicular to the walkway’s direction. This creates texture that prevents slipping on ice. Exposed aggregate requires washing and brushing the surface to reveal decorative stones within the mix. Stamped patterns must be pressed into the concrete at precisely the right moment when the surface is firm enough to hold the pattern but soft enough to accept the stamp.
“Control joints manage cracking. All concrete cracks as it cure and experiences temperature changes. Control joints determine where those cracks occur.”
In curved walkways, cut or tool joints perpendicular to the curve’s radius every 4 to 6 feet. This approach keeps cracks at the bottom of the joint where they remain hidden rather than randomly across the surface.
Use a radius edger to create clean, rounded borders along both edges. This finishing touch prevents chipping and gives the walkway a professional appearance that distinguishes quality work from amateur installations.
Curing begins immediately after finishing. Keep the surface continuously moist for at least seven days using plastic sheeting, wet burlap, or a liquid curing compound. Proper curing allows the concrete to reach its designed strength and durability.
Restrict foot traffic for 24 to 48 hours. Keep vehicles off the walkway for at least seven days. During the first two winters, avoid using salt (sodium chloride) for ice control. Salt chemically attacks new concrete, accelerating deterioration. Use sand or concrete-safe ice melts instead.
Installation Phase | Timeline | Key Action |
|---|---|---|
Planning and layout | 1-2 days | Mark curve, check utilities, finalize design |
Excavation and base prep | 2-3 days | Dig, install gravel, compact thoroughly |
Forming and reinforcement | 1 day | Install flexible forms, position rebar |
Pouring and finishing | 1 day | Pour concrete, apply finish, cut joints |
Initial curing | 7 days | Keep moist, restrict traffic |
Full cure | 28 days | Reach design strength |
Building a curved concrete walkway requires specialized knowledge of local soil conditions, climate-specific concrete mixes, and precise forming techniques. Small mistakes during any phase lead to expensive repairs that often exceed the cost of professional installation.
Atlantic Hardscape and Concrete brings 15 years of Fredericton-specific experience to every walkway project. Our team understands how New Brunswick’s clay soils, freeze-thaw cycles, and drainage challenges affect concrete performance. We handle every phase from 3D design visualization through final sealing for your curved walkway project.
Our integrated approach includes proper sub-base preparation, climate-adapted concrete specifications, and drainage solutions that protect your investment and your property’s foundation. We use specialized tools and premium materials not available through retail channels, backed by honest recommendations focused on your long-term satisfaction.
A properly installed curved concrete walkway lasts 20 to 30 years with minimal maintenance in Fredericton’s climate. Professional installation with correct sub-base preparation, air-entrained concrete, and integrated drainage proves necessary for this longevity. Regular resealing every 3 to 5 years protects the surface and extends service life further.
Curved walkways require slightly more labour for forming but use similar material quantities as straight paths. The modest cost increase typically ranges from 10 to 15 percent. However, the long-term return on investment through improved curb appeal and increased property value often outweighs this difference. Decorative finishes like stamping or exposed aggregate add to the investment regardless of path shape.
DIY curved walkway installation is possible but presents significant technical challenges. Flexible forming, proper sub-base compaction, drainage planning, and finishing timing require experience and specialized tools. Common DIY mistakes include incorrect concrete mix ratios, insufficient base preparation, poor drainage design, and improper curing. These errors lead to costly repairs that frequently exceed professional installation costs. Professionals bring Professionals bring climate-specific expertise and access to commercial-grade materials unavailable to homeowners.
All concrete eventually cracks, but proper installation controls where cracks occur and keeps them hidden. Install a well-compacted granular sub-base, use air-entrained concrete with adequate compressive strength, place reinforcement correctly, and cut control joints perpendicular to the curve’s radius every 4 to 6 feet. Avoid using salt during the first two winters, as it chemically attacks new concrete and accelerates deterioration. Proper drainage prevents water from pooling and freezing beneath the slab.
GET STARTED
Your dream space is within reach as we work together from detailed 3-D designs to the final custom build. Our process is both professional and exciting, and we look forward to taking this journey with you.
Contact
34 Jackstraw Court, Fredericton, NB, Canada, New Brunswick
