Uncategorized

pool excavation Fredericton
Uncategorized

What are the risks of attempting a DIY Pool Excavation?

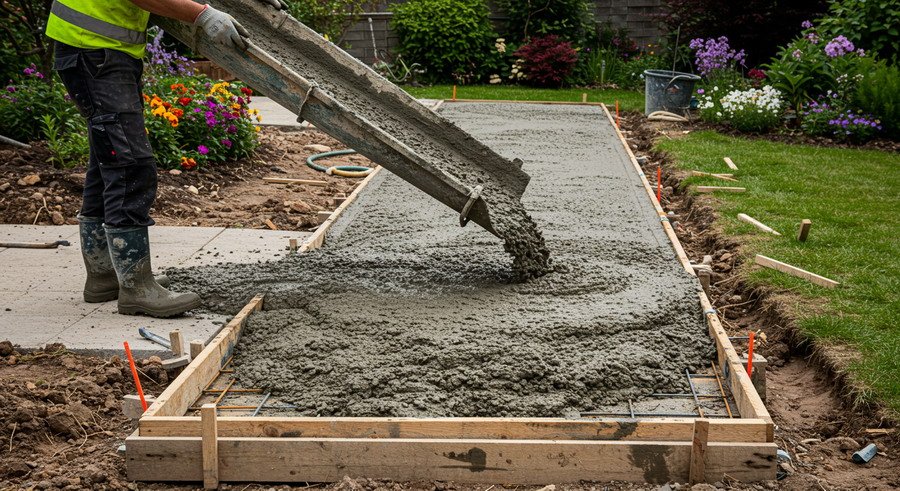
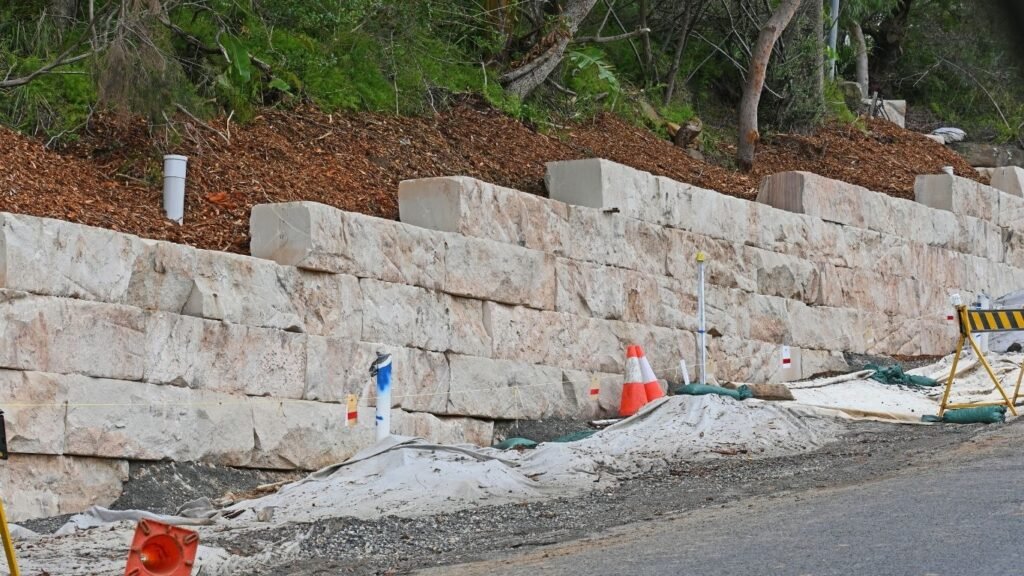
What are the risks of attempting a DIY Pool Excavation? Thinking about adding a sparkling pool to your backyard? If you’re considering a DIY pool excavation, you may want to pause and think about the risks involved. While the idea of saving money and taking on the challenge yourself can be tempting, many homeowners underestimate the complexities of excavation work. From dangerous underground utility lines to tricky soil conditions, the potential pitfalls are numerous. Not to mention, even seemingly minor mistakes in measurements or planning can lead to costly rework or safety hazards. Before you grab a shovel or rent an excavator, it’s important to understand the realities of DIY pool excavation. In this article, we will explore the risks involved, helping you decide whether taking on this daunting task is truly worth it. Is DIY pool excavation possible? While DIY pool excavation is technically possible, it’s a project that requires careful consideration. The task demands significant physical effort, specialized equipment, and extensive knowledge of soil conditions and excavation techniques. For most homeowners, undertaking pool excavation without professional help can be risky. The process involves precise measurements, proper soil removal, and adherence to local building codes. Even small mistakes during excavation can lead to expensive repairs or structural issues. Given the complexity and safety risks involved, it’s generally better to hire experienced professionals for pool excavation projects. Lets discuss the risk of DIY excavation one by one.  Dangers of DIY Pool Excavation Soil conditions Your backyard’s soil type can make or break your swimming pool excavation project. Clay soil presents significant challenges as it becomes unworkable when wet and rock-hard when dry, making digging nearly impossible in certain conditions. Sandy soil requires extra support systems to prevent dangerous cave-ins during the excavation process. If you’re dealing with rocky terrain, you’ll need specialized equipment that most homeowners don’t have access to, significantly extending your timeline. Underground water tables pose another serious threat, potentially flooding your excavation site and compromising the entire project. Hidden debris like old construction materials can damage expensive rental equipment and create unexpected disposal costs. Utility lines One wrong move with an excavator can lead to catastrophic consequences when dealing with underground utilities. A gas line strike could cause deadly explosions, putting you and your neighbors at risk. Hitting electrical cables isn’t just dangerous – it’s potentially fatal. Water main breaks can flood your property and cause extensive damage, while severing cable and internet lines affects service for entire neighborhoods. Local utility companies must mark all underground services before any pool excavation work begins. Skipping this critical step could result in severe injury, property damage, and costly repairs. Improper measurements Precision in pool excavation is not just about getting the size right – it’s about creating a safe, functional structure. Incorrect depth calculations can affect the pool’s structural integrity, potentially leading to costly repairs or complete failure. Improper slope angles might cause wall collapse during or after construction. Wrong dimensions create problems with liner fitting and equipment installation. Even small measurement errors can create significant issues with water circulation, potentially requiring extensive rework to correct. Fredericton weather Local weather conditions play a important role in pool excavation success. Rain can quickly transform your carefully planned dig site into an unmanageable mud pit, making it impossible to continue work and potentially destabilizing already excavated areas. Wet ground significantly increases the risk of cave-ins, putting workers and equipment at risk. During Fredericton summer months, extreme heat creates dangerous working conditions, especially when operating heavy machinery or performing manual labor. Cold and snowy weather can affect equipment performance and make soil conditions more challenging to work with, leading to unexpected delays and complications in your pool project. Soil disposal Many homeowners underestimate the sheer volume of soil that needs to be removed during pool excavation. An average residential pool creates between 100-200 cubic yards of spoil – that’s enough to fill several dump trucks. Local regulations may restrict where and how you can dispose of excavated soil, limiting your options and potentially increasing costs. Transportation expenses can quickly spiral out of control as multiple trips are often required to haul away all the dirt. Without proper planning and budgeting for soil disposal, you might find yourself with massive dirt piles that become both an eyesore and a liability on your property. Safety Pool excavation safety isn’t just about following guidelines – it’s about protecting lives. Trench collapses can happen in seconds, potentially burying workers before they have a chance to react. Operating heavy machinery requires specialized training and constant vigilance to prevent accidents. The edges of excavation sites present serious fall hazards, especially when soil is loose or wet. Working in confined spaces creates additional risks, including exposure to harmful equipment fumes and limited escape routes in emergencies. Professional excavators follow strict safety protocols and have proper insurance coverage – protections that most DIY projects lack. Expertise Professional pool excavators bring years of specialized knowledge to each project. They understand soil mechanics and how different soil types behave during excavation. Their equipment operation skills come from extensive training and experience, not just a quick rental orientation. These experts know how to implement proper safety protocols and can quickly identify and solve problems before they become major issues. Technical specifications for pool installation require precise understanding – knowledge that comes from years of hands-on experience rather than online research or YouTube tutorials. Expenses & delays What often starts as a cost-saving DIY project can quickly become more expensive than hiring professionals. Equipment rental costs mount quickly when projects extend beyond initial timelines. Unexpected soil conditions might require specialized equipment or additional labor. Permit delays can keep expensive rental equipment sitting idle. Material prices can increase during extended project timelines. Perhaps most costly are the repairs needed to fix DIY mistakes – errors that professionals would have avoided from the start. Injury Physical risks during pool excavation go far beyond simple muscle strain. Back injuries commonly occur from improper lifting techniques and extended periods

Keep Landscape Lights From Tilting
Uncategorized

How to Keep Landscape Lights From Tilting?

How to Keep Landscape Lights From Tilting? Nothing ruins the ambiance of your outdoor space quite like crooked landscape lights. Whether you have invested in solar lights for your garden paths or installed wired landscape lighting around your yard, keeping them upright can feel like an ongoing battle. Let’s explore proven solutions to keep your outdoor lights standing tall and illuminating your space exactly as intended. Use sturdy stakes The foundation of stable landscape lighting starts with choosing the right stake material. While those plastic stakes that often come with yard lights might seem fine at first, they are usually the root cause of tilting troubles. Metal stakes crafted from aluminum, brass, or copper provide significantly better stability and longevity. Though they might cost more initially, their durability makes them a smart investment that saves you from frequent replacements and ongoing frustration. Stakes length Your landscape light stake serves as the anchor for your entire lighting fixture. Just like a tent needs proper stakes to stay upright in the wind, your lights need adequate support beneath the surface. Stakes measuring 12-18 inches provide optimal stability, especially in areas with loose or frequently wet soil. This extra length creates a deeper foundation that resists movement from wind, rain, and natural ground settling. Proper installation Installing your light stakes requires more finesse than simply pushing them into the ground. Start by creating a pilot hole using a garden trowel or dedicated tool. Position your stake perfectly vertical—using a level can help ensure precision. Once positioned, pack soil firmly around the base in layers, creating a solid foundation that prevents future movement. By taking the time to properly select and install your stakes, you lay the groundwork for a stable and effective landscape lighting system. Utilize light fixers Light fixers act as intermediaries between your stakes and fixtures, providing crucial stability enhancement. Think of them as shock absorbers for your landscape lights, allowing for precise adjustment while maintaining rigidity. These devices typically feature adjustable components that let you fine-tune the angle of illumination without compromising stability. When installing light fixers, secure the fixer to your stake following the manufacturer guidelines, ensuring all connection points are tight. The light fixture should then attach smoothly to the fixer’s mounting point, creating a secure joint that resists movement from environmental factors. By properly utilizing light fixers, you enhance the stability of your yard lights, ensuring they remain perfectly aligned while delivering optimal illumination for your outdoor space. Employ expanding foam For particularly challenging soil conditions, expanding foam offers a reliable solution for stabilizing landscape lights. Begin by digging a hole slightly wider than your stake’s diameter. Place the stake in position, ensuring it’s perfectly vertical, then carefully fill the surrounding space with expanding foam. As the foam cures, it creates a solid foundation that effectively prevents movement. This method works particularly well in areas where traditional soil compacting proves ineffective. Installation tips The foam expands significantly as it cures, so use it sparingly. Once hardened, it creates a permanent solution that’s difficult to modify, so ensure your light placement is exactly where you want it before application.  Remember that while expanding foam provides excellent stability, its permanence means you need to be absolutely certain about your light placement before implementing this solution. Consider concrete sleeves In Fredericton where freeze-thaw cycles are common, concrete sleeves provide excellent protection against frost heave. These sleeves create a barrier between your yard light stake and the shifting soil, preventing the natural ground movement that often causes lights to tilt. By isolating your light fixture from soil displacement, you maintain proper alignment throughout seasonal changes. This solution is particularly valuable in colder climates where ground movement can be a significant issue. Installation tips Start by digging holes at least 24 inches deep, ensuring they’re wide enough to accommodate both the sleeve and surrounding concrete if desired. Position the sleeve vertically, using a level to ensure perfect alignment. Once the sleeve is secure, insert your light stake, making any necessary adjustments to height and angle before final installation. While this method requires more initial effort, it provides a long-term solution that significantly reduces maintenance needs and extends the life of your landscape lighting system. Regular maintenance Check regularly A proactive approach to maintenance can prevent most tilting issues before they become serious problems. During your regular yard maintenance, inspect your landscape lights for early signs of movement. Pay special attention after heavy rains or strong winds, as these conditions often contribute to stake instability. Adjust and tighten When you notice a light beginning to tilt, address the issue immediately. Check all connection points, tighten any loose components, and examine the soil condition around the base. Sometimes, simply adding and compacting additional soil around the stake can resolve minor tilting issues. For more severe cases, you might need to reinstall the stake or implement one of the more robust solutions discussed earlier. How to avoid light tilting issues? Choose quality fixtures Your yard lighting system is only as reliable as its weakest component. Investing in quality fixtures made from durable materials like brass or copper pays dividends in longevity and performance. High-quality fixtures typically feature better construction, weather-resistant seals, and more substantial mounting hardware. While they may cost more upfront, their superior durability reduces maintenance needs and replacement frequency. Proper wiring Even perfect stake installation won’t matter if your wiring creates tension on your fixtures. Plan your wire routes carefully, allowing enough slack for natural ground movement. Bury wires at appropriate depths – typically 6 inches for low voltage systems – and use proper waterproof connections. Create gentle loops near each fixture to prevent direct pulling on the light housing, which can contribute to tilting over time. Consider Professional Installation Calling in the experts is the most cost-effective solution on the longer run. Professional landscape lighting installers in Fredericton bring experience and specialized tools to ensure proper placement and stability. They understand local soil conditions, drainage patterns, and frost depths, allowing them

mistakes that can ruin your concrete walkway
Uncategorized

11 Mistakes That Can Ruin Your Concrete Walkway

11 Mistakes That Can Ruin Your Concrete Walkway You might be going to install your concrete walkway, but wait – look for the common mistakes which can ruin your walkway project. Have you watched your neighbors struggle with crumbling walkways and wondered how to avoid the same fate? Poor installation practices often lead to premature concrete failure and costly repairs. Success in concrete installation comes from knowing what not to do. By avoiding common mistakes and following proper techniques which we are going to discuss next, you will create a walkway that maintains its beauty and functionality throughout the life. Planning pitfalls Poor planning is one of the biggest headaches in concrete projects, especially when installing a new walkway. Your concrete walkway needs careful planning before the first shovel hits the ground. Think about measuring twice and pouring once. Many property owners make the mistake of eyeballing measurements or skipping the material calculations, leading to common concrete problems you will want to avoid. Building material requirements deserve your full attention. Getting caught short on concrete mix during a pour can create cold joints – weak spots where old and new concrete meet. Its smart to order about 10% more than your calculations show you will need. The surface of concrete walkways should complement your outdoor space. Take time to sketch your yard design and check if it flows naturally with your yard’s layout. Without a clear plan, you might end up with a walkway that looks out of place or doesn’t serve its purpose effectively. Foundation flaws The durability of your concrete walkway starts from the ground up. Poor soil preparation often leads to shifting and settling, causing cracks in your concrete slab that no amount of concrete repair can fully fix. These common concrete problems show up months or even years after installation. Start by removing all organic material and loose soil from your project area. Any vegetation left underneath will decompose, creating voids that make your concrete surface unstable. The soil needs thorough compaction to prevent future settling. A layer of gravel or crushed stone creates a stable base that enhances your outdoor space. This 4-inch foundation layer does two essential jobs: it provides proper drainage and gives your concrete structure steady support. Without proper base preparation, water can get trapped, leading to freeze-thaw cycles that crack and damage your walkway. Remember that moisture content in the soil can affect your foundation’s stability. You may need to wait for optimal conditions before proceeding with your concrete projects. This patience pays off by preventing surface issues that could lead to spalling or other concrete damage. Base compaction mistakes You might think that simply laying gravel is enough for your concrete walkway’s foundation, but skipping proper compaction is a costly mistake. A loose base is like building on quicksand – your concrete surface will eventually show signs of distress. Base compaction directly affects your walkway’s durability. When you skip this step, the gravel or crushed stone underneath your concrete slab remains loose, allowing for uneven settling. This common concrete problem leads to cracks and surface irregularities that no amount of concrete repair can permanently fix. Professional concrete services always emphasize proper base preparation. Each layer of your foundation needs thorough compaction to create a stable platform. Without this vital step, your concrete structure becomes vulnerable to shifting and settling, especially after heavy rains or freeze-thaw cycles. The process requires more than just running a plate compactor once over the surface. Your building material needs compaction in layers, with each layer firmly pressed before adding the next. This method ensures there are no weak spots that could compromise your walkway’s stability. Water and air pockets in an uncompacted base spell trouble for your concrete needs. Over time, these voids collapse under the weight of your concrete slab, creating uneven areas that can lead to cracking and spalling. Proper drainage becomes impossible when your base isn’t uniformly compacted. Inaccurate concrete blend Have you mixed your concrete to the right consistency? The way you mix your concrete can make or break your walkway project – literally. Many people think adding extra water makes the job easier, but this common mistake leads to serious concrete issues. Water in the concrete mix needs careful control. Too much water weakens your concrete surface, while too little makes it hard to work with. Quality concrete should have a consistency like thick oatmeal – not soup and not dry cake mix. This proper balance ensures your walkway’s long-term durability. The relationship between cement and water is delicate. When you add too much water, bleed water rises to the top surface, creating a weak layer that’s prone to spalling and cracking. This incorrect concrete mix can reduce your walkway’s strength by up to 40%. Your concrete needs the right moisture content for proper curing. Following manufacturer instructions isn’t just a suggestion – it’s how you ensure your concrete remains strong through years of use. The type of concrete you choose might have specific mixing requirements for optimal results. Remember that environmental conditions can affect your mix too. Hot weather might require slight adjustments to prevent rapid drying, while cold weather presents its own challenges. These factors influence how your concrete slab performs over time. Missing reinforcement Did you know your concrete walkway faces constant stress from weight, weather, and ground movement? Skipping reinforcement is like building a house without a framework – it might look fine at first, but problems show up quickly. A concrete surface without proper reinforcement becomes vulnerable to cracking. While concrete excels at handling compression, it needs help with tension forces. This is where reinforcement becomes a key building material that significantly reduces the risk of your walkway developing serious cracks. Think of rebar or wire mesh as the skeleton of your concrete structure. When properly positioned within your concrete slab, these reinforcements help distribute weight evenly across the surface of concrete. This distribution prevents the common concrete problems that lead to unsightly cracks

retaining wall construction and repair in Fredericton
Uncategorized

How to address settling issues with retaining walls?

How to address settling issues with retaining walls? Have you noticed your retaining wall starting to lean or crack? These symptoms of settling can signal serious structural problems that require immediate attention. Knowing how to address settling issues with retaining walls is critical for preventing costly failures and protecting your property value. This comprehensive guide breaks down the causes of wall settlement, outlines effective repair strategies, and provides expert insights on prevention. Learn practical solutions to stabilize your wall and maintain its structural integrity for decades. Causes of settling issues  Poor drainage Water is often the primary culprit behind retaining wall problems. When water accumulates behind the wall, it creates hydrostatic pressure that can force your wall to move or lean. Inadequate drainage allows water buildup behind the wall, making the soil heavier and increasing pressure on the structure. Without proper drainage systems in place, your retaining wall may experience significant stress that compromises its structural integrity. Soil instability  When the soil isn’t properly compacted or is prone to erosion, it can shift and settle, causing your wall to move. You might notice visible gaps between the soil and wall, bulging sections, or cracks in the structure. The type of soil also matters – expansive soils that swell with moisture or sandy soils that wash away easily can create ongoing problems for your wall’s stability. Inadequate foundation design Your retaining wall’s foundation is like the roots of a tree – without proper support, the structure becomes unstable. A poorly designed foundation might not distribute weight properly or provide sufficient support, leading to uneven settling and structural issues. The depth and width of the foundation must be appropriate for the height of the wall and soil conditions. When engineers skip proper site analysis or cut corners on foundation work, the entire wall structure becomes compromised. Construction errors Poor construction practices can doom your retaining wall from the start. Improper backfill installation creates weak points in the structure, while insufficient compaction of soil leads to settling issues over time. Missing or incorrectly installed weep holes prevent proper water drainage, and lack of proper reinforcement makes the wall susceptible to pressure damage. These construction mistakes often show up months or years after completion when the damage becomes visible. How to address common problems with retaining walls? Assess the damage Before making any retaining wall repairs, carefully examine your wall’s condition. Watch for tilting or leaning sections that indicate structural problems. Note any cracks in the wall surface, especially those that grow larger over time. Pay attention to separation between materials or blocks, as this suggests movement within the structure. Water damage signs, like staining or efflorescence, point to drainage problems that need addressing. Identify the root cause An in depth investigation helps determine the root cause of settling. Inspect drainage systems for clogs or damage that prevent proper water flow. Look for patterns of soil erosion around the wall’s base or behind it. Foundation problems might show up as uneven settling or continuous movement. Construction defects often become apparent through irregular patterns of damage or failure points at specific locations. Drainage correction Fixing drainage issues requires a systematic approach to water management. Installing french drain near your retaining wall creates a path for water to flow away naturally. The system should include proper grading to direct surface water away from the wall.  Weep holes placed strategically through the wall structure allow trapped water to escape, reducing hydrostatic pressure. Your drainage system needs regular maintenance to prevent clogs and ensure continuous water flow. Soil stabilization Proper soil management behind the wall prevents future settling problems. Introducing compacted soil in layers creates a stable base that resists movement. Geotextile materials placed between soil layers prevent erosion while allowing water to pass through. The right soil mixture behind your retaining wall makes a significant difference – using materials that drain well while maintaining structural support is key. Repair or replace damaged retaining wall sections When your retaining wall shows damage, prompt action prevents further deterioration. Small cracks might need simple patching. In the case of larger structural issues it will require section replacement. Using materials that match your existing wall ensures a cohesive look while maintaining structural integrity. Sometimes, rebuilding portions of the wall becomes necessary if the damage is extensive. Solutions to fix retaining wall settling Helical piers These steel supports screw into the ground beneath your retaining wall to provide additional stability. Think of them as underground anchors that help distribute the wall’s weight to deeper, more stable soil layers. The installation process minimizes disruption to your existing landscape while offering immediate support to settling walls. Tiebacks Installing tiebacks creates a strong connection between your retaining wall and the solid ground behind it. These anchors extend deep into the soil, securing the wall against forward movement. The process requires careful calculation of soil pressures and proper installation angles to ensure maximum effectiveness. Cribbing Temporary support structures help prevent further movement while permanent repairs take place. Wooden or concrete cribbing provides immediate stability to compromised sections of your wall. This method buys time for proper assessment and implementation of long-term solutions. Preventing settling issues Prevention starts with proper retaining wall design and construction. Your retaining wall needs adequate reinforcement based on its height and the pressure it must withstand. Regular inspections help catch minor issues before they become major problems. Maintaining proper drainage around your outdoor space significantly extends your wall’s lifespan. Get in touch with Atlantic Hardscape for expert retaining wall solution Atlantic Hardscape and Concrete brings 15+ years of experience to retaining wall construction and repair. Our team understands local soil conditions and drainage requirements specific to the Fredericton area. We offer comprehensive assessments and solutions tailored to your specific situation, ensuring your retaining wall remains stable for decades. Summary Proper drainage is important for preventing retaining wall settlement – install french drains, weep holes, and maintain proper grading to direct water away from the structure and reduce hydrostatic pressure that causes

downspouts installation and repair Fredericton
Uncategorized

How to Deal with Frozen Downspouts After a Snowstorm?

How to Deal with Frozen Downspouts After a Snowstorm? If you have ever experienced the frustration of frozen downspouts after a snowstorm in Fredericton, you know how challenging winter maintenance can be. The problem isn’t just about blocked drainage – it’s about protecting your home from potential water damage and structural issues. Thankfully, there are effective methods to both prevent and resolve frozen downspouts. From immediate action steps to long-term prevention strategies, we’ll walk you through everything you need to know about maintaining proper drainage during winter’s coldest days. 6 common causes of frozen downspouts Here’s what makes your downspouts freeze during winter storms: When winter temperatures plummet below freezing point, any water lingering in your gutter system turns to ice. This natural freezing process often starts in the elbows of downspouts where water tends to collect, creating an ice blockage that can expand and cause damage to your gutters and downspouts. Your gutters and downspouts can become clogged with fallen leaves, pine needles, and small twigs. When snow and ice accumulate on top of this debris, it creates perfect conditions for ice dams to form. The trapped water can’t flow properly through the system, leading to frozen downspouts. Ice dams in your gutters form when snow melts on your warm roof and then refreezes at the edges. This cycle prevents water from flowing freely through the downspouts, causing water to back up and freeze solid. The weight of ice can strain your entire gutter system. Your gutter and downspouts need proper slope to effectively channel water away from the house. Without adequate pitch, water sits stagnant in the system, making it more likely to freeze during cold snaps. This can lead to serious ice buildup in your downspout. Snow piles and frozen ground near where the downspouts exit can prevent water flow. When water can’t escape, it backs up into the downspout and freezes, creating a solid block of ice that can damage your drainage system. Freezing rain and rapid temperature swings during winter storms create ideal conditions for ice forming in your gutters. The quick freeze-thaw cycles cause snow and ice to melt and refreeze repeatedly, leading to larger ice dams and frozen downspouts. Signs your downspouts are frozen During winter months, frozen downspouts can create significant problems for homeowners. Recognizing the early warning signs can help prevent costly damage to your property. Here are the key indicators that your downspouts might be frozen. Ice formation and water accumulation One of the most visible signs of a frozen downspout is the presence of large icicles forming at the base or along the length of your downspout. These icicles develop when water cannot flow properly through the system and instead freezes as it tries to find an alternative path. If you notice unusual ice formations around your downspouts, it’s a clear indication that there’s a blockage somewhere in the system. Overflowing gutters When your gutters start overflowing or appear to be full of standing water, this is often a sign that your downspouts are frozen. During normal operation, water should flow freely through your gutters and down the spouts. If you observe water spilling over the sides of your gutters, especially during warmer parts of the day when snow is melting, your downspouts likely have an ice blockage preventing proper drainage. Water pooling around foundation Another sign is the presence of water pools near your home’s foundation, particularly around the areas where downspouts discharge. These pools form because the frozen blockage prevents water from being properly channeled away from your house. In winter, these pools can create dangerous ice patches and, more importantly, indicate that your drainage system isn’t functioning as it should. Pro tips for visual inspection Regular visual inspections can help you spot these issues early. Look for bulging or distorted sections in your downspouts, as these could indicate areas where water has frozen and expanded. Check for any unusual dripping or water marks on the exterior walls near your downspouts, as these might suggest that water is backing up and finding alternative paths due to frozen blockages. Understanding these signs allows homeowners to take prompt action before the situation worsens. If you notice any of these indicators, it’s important to address the issue quickly to prevent potential damage to your home’s drainage system and foundation. How to safely thaw frozen downspouts Dealing with frozen downspouts requires patience and careful attention to prevent damage to your drainage system. You can start by removing any snow buildup around your downspouts. This helps create a clear path for water to flow away from the house once the ice begins to melt. Take time to clear away any visible debris that might be blocking the opening of the downspout. Hot water  One of the most effective ways to thaw frozen downspouts is to pour hot water. Start by pouring a steady stream of hot water at the top of the downspout where the ice blockage begins. Let the water gradually work its way down, melting the ice as it flows. You might need to repeat this process several times to completely clear the ice buildup in your downspout. Hair dryer For stubborn ice that won’t melt with hot water alone, consider using a hair dryer. This method requires more time but helps prevent ice dams from forming again quickly. Keep the hair dryer moving to avoid concentrating too much heat in one spot, which could damage your gutter system. Work from the bottom up, allowing the melted water to flow freely without refreezing. De-Icing agent If you are dealing with particularly challenging ice blockage, you might want to try using ice melt products. However, be cautious with this approach. While these products can help thaw your gutters and downspouts, use them sparingly. Too much de-icing agent can harm your landscaping and potentially damage your gutter system. Make sure to monitor the water flow as the ice begins to thaw to ensure proper drainage. Remember that prevention is often better

paver sink or shift during winter
Uncategorized

Why do pavers shift or sink during winter?

Why do pavers shift or sink during winter? Is your paver patio showing signs of movement this winter? You are not alone. Many homeowners in Fredericton notice their once-perfect paver surfaces starting to shift and sink during the cold months. This natural phenomenon affects driveways, walkways, and patios across colder regions. Understanding why your pavers move during winter can help you prevent damage and maintain your outdoor living space. Let’s explore the science behind winter paver movement and learn how proper installation, maintenance, and care can protect your landscape investment from the harsh effects of freezing temperatures. Frost heave Think of your landscape like a layered cake. When winter hits, water trapped in the soil under your pavers freezes. Just like when ice cubes form in your freezer tray, this frozen water expands. This expansion creates an upward force that can make your pavers shift and move over time. Your paver patio or walkway might be more prone to frost heave depending on a few things. Sandy soils tend to drain better, while clay soils hold more water and are more likely to cause problems. Areas that get lots of shade can stay frozen longer, and poor drainage can make things worse. Here’s what you might see happening to your outdoor space: Uneven pavers creating trip hazards Gaps between paver stones Some areas of your patio becoming higher than others Pavers sinking in certain spots The freeze and thaw cycles during winter can really do a number on your hardscape if it wasn’t built properly. That’s why proper base preparation and drainage are so important during the installation process. A properly compacted base and the right materials can help prevent these winter headaches. Thawing and settling affects paver surfaces Think of your paver patio as a blanket laid over the ground. When winter ends and temperatures rise, something interesting happens beneath that blanket. The frozen ground starts to thaw, and all that expanded ice turns back into water. This is where your pavers might start playing hide and seek with your landscape design! As the ground underneath thaws, it doesn’t always settle back evenly. Imagine stirring a cup of hot chocolate – some parts mix faster than others. That’s similar to how your outdoor space responds to warming temperatures. Some areas might thaw quickly while others take their time, leading to uneven settling that can make your pavers sink or shift in different spots. This is particularly noticeable in areas where the base was not properly prepared during the initial paver installation. Your driveway or patio area might show various signs of settling. You could notice some pavers sinking lower than others, or gaps appearing between paver stones. Sometimes you’ll spot dips forming in certain areas, while the edges of the pavers become misaligned. These issues often appear near pool areas or where drainage isn’t optimal, making your once-level surface look a bit wobbly. The good news is that interlocking pavers can be fixed when they become uneven. Unlike solid concrete, paver stones can be lifted and reset when the ground shifts. However, if your base material wasn’t properly compacted during installation, you might see these issues occur more frequently. That’s why having proper drainage and ensuring your pavers are laid on a properly prepared base is so important for maintaining your outdoor living space. Regular maintenance and addressing any drainage issues early can help your patio last for many years. Poor installation Your paver problems might stem from improper installation techniques. A proper base requires careful preparation and attention to detail during the installation process. The foundation needs sufficient depth to support the weight of both the pavers and any expected traffic. The base material must be properly compacted in layers to prevent future settling, using appropriate materials that promote effective drainage. Installing edge restraints around the perimeter keeps pavers from spreading outward under pressure. Poor drainage is particularly problematic, as it allows water to accumulate beneath the surface. When water pools in these areas, it intensifies the effects of freeze-thaw cycles. Think of it as building a house – without a solid foundation and proper water management, structural issues are almost inevitable. Temperature changes The materials in your paver installation respond differently to temperature fluctuations, much like how various materials in your home expand and contract at different rates. The stones, sand, and base materials each react uniquely to temperature changes, creating subtle movements within your paver structure. These tiny shifts might seem insignificant at first, but over time they can create spaces between pavers where water can infiltrate. This thermal movement is natural and unavoidable, but proper installation techniques can help minimize its impact. The key lies in using appropriate joint sand and maintaining proper spacing between pavers to accommodate these natural movements while preserving the integrity of your outdoor space. Improper snow removal techniques Metal shovels and snowplow blades are like sandpaper against your paver stones. When you drag these tools across your landscape, they can leave scratches, chips, and cracks in your pavers. It’s similar to using a metal spoon on a non-stick pan – the surface gets damaged bit by bit. These seemingly small marks create perfect hiding spots for water, which can freeze and cause your pavers to shift over time. The way you remove snow matters too. Forceful shoveling can disturb the carefully laid pattern of your interlocking pavers. This rough treatment can loosen the edge restraints and disrupt the base material underneath, leading to uneven pavers when spring arrives. The joint sand between your pavers plays a vital role in keeping water out. When you scrape away snow too aggressively, you might also remove this important sand. Without proper joint sand, water seeps down between the paver stones, creating a perfect setup for freeze-thaw cycles that can make your pavers sink or shift. Using ice melt products properly is also key – too much can damage your paver surface and make it more likely to absorb water. If you want

snow shoveling Fredericton
Uncategorized

Pro Tips for Safe Snow Shoveling in Fredericton

Pro Tips for Safe Snow Shoveling in Fredericton Living in Fredericton means embracing winter’s challenges, including the essential task of snow removal. But before you bundle up and head out with your shovel, it’s important to understand the proper techniques that can prevent injury and make the job easier. Snow shoveling isn’t just about clearing paths – it’s about doing so safely and efficiently. From selecting the right equipment to knowing when to take breaks, these professional insights will help you master winter property maintenance. Dress up properly When you are getting ready to tackle snow shoveling in Fredericton, proper winter gear can make all the difference between a comfortable experience and a miserable one. With daytime temperatures typically hovering around 0°C and nighttime lows dipping to -9°C, you’ll need to dress strategically for the task ahead. Start with a moisture-wicking base layer that keeps sweat away from your skin. Add an insulating middle layer, like a fleece or wool sweater, and top it off with a water-repellent outer shell. This three-layer system lets you easily adjust your clothing as you warm up during shoveling. Don’t forget about your feet! Pick winter boots with excellent traction to prevent dangerous slips on icy surfaces.  Remember, you can always remove layers as you warm up from the physical activity, but you’ll want to have enough coverage to stay protected from Fredericton’s winter elements. Use the right shoveling equipment Having the right tools can transform your snow clearing from a backbreaking chore into a manageable task.  Look for these key features in your snow shovel: A handle length that reaches about chest height when standing straight An ergonomic design with a bent handle to reduce back strain A lightweight material like aluminum or plastic for the blade A comfortable, cushioned grip that won’t slip when wet Here’s a pro tip: opt for a shovel with a smaller blade size. While it might seem counterintuitive, a smaller blade helps prevent you from lifting too much snow at once, reducing your risk of injury. Think about it – lifting smaller amounts more frequently is easier on your body than struggling with heavy loads. Consider investing in a plastic blade shovel with a metal wear strip along the bottom edge. This clever combination gives you the best of both worlds – the lightweight advantage of plastic with the durability to handle rough sidewalks and driveways. Plus, you won’t need to replace your shovel as often, saving you money in the long run. Also apply a light coat of cooking spray on your shovel it will prevent snow from sticking, making the task more efficient. Adopt smart snow shoveling technique Timing is everything when it comes to snow removal in Fredericton! You’ll find the task much easier if you head out soon after the snowfall begins. Fresh, powdery snow is significantly lighter and more manageable than the heavy, packed snow that forms when people walk or drive over it. Here’s your step-by-step guide to proper shoveling technique: Push the snow forward like a plow whenever possible Keep your movements steady and controlled Take smaller amounts of snow with each pass Work in sections to avoid overwhelming yourself When you absolutely need to lift snow: Stand with feet shoulder-width apart Bend at your knees, not your waist Hold the shovel close to your body Avoid twisting movements Step in the direction you’re tossing snow Remember to pace yourself! Breaking up your shoveling into manageable chunks helps prevent exhaustion. Think of it as a workout – you wouldn’t try to lift heavy weights without proper form, and the same principle applies to snow removal. By following these techniques, you’ll protect your back while keeping your Fredericton property safe and accessible during winter weather. Finding your winter work rhythm Shoveling snow in Fredericton requires more than just the right technique – it’s all about finding your perfect pace. Think of snow shoveling as a winter workout that demands respect and careful attention to your body’s signals. Taking regular breaks every 15-20 minutes isn’t being lazy; it’s being smart and preventing exhaustion that could lead to injuries. Stay hydrated throughout your snow clearing session by drinking water before, during, and after the task. Your body works hard in cold weather, even if you don’t feel thirsty. It’s also important to time your shoveling wisely – avoid heading out right after meals when your body is focused on digestion, as this puts extra strain on your heart. Watch for nature’s hidden hazards while working. Ice often lurks beneath fresh snow, creating invisible slip hazards. Make your winter property maintenance safer by spreading salt or sand as you go, especially on walkways and high-traffic areas. This proactive approach helps prevent accidents and makes future snow clearing easier. Remember, maintaining your Fredericton property during winter is about working smarter, not harder, and keeping safety as your top priority. Professional Snow Removal – A Smarter Winter Solution in Fredericton, NB When Fredericton’s winter weather hits, you might wonder if it’s time to hand over your snow removal duties to the experts. Professional services offer a safer, more efficient alternative to tackling winter’s challenges on your own. Their experienced team brings commercial-grade equipment and proven techniques to clear your property quickly and thoroughly. Consider the peace of mind that comes with professional snow removal. While you stay warm inside, trained experts handle the heavy lifting, using specialized equipment that far surpasses standard home snow shovels. This means no more early morning shoveling sessions or worrying about potential injuries from improper technique or overexertion. Atlantic Hardscape and Concrete‘s professional snow removal service helps protect your property and your health. Our team understands Fredericton’s unique winter challenges and maintains clear access to your home or business throughout the season. We will ensure proper ice management and snow placement, preventing damage to your landscape and structures. Why not start your winter stress-free? Contact us for a customized estimate. Let our expertise keep your property safe and accessible all

snow plowing in Fredericton
Uncategorized

How to Time Snow Plowing in Fredericton?

How to Time Snow Plowing in Fredericton? As snowflakes gently fall outside the window of your Fredericton property, you wonder when the right time to start plowing is. Whether you are responsible for maintaining roads, managing a property, or keeping your own driveway clear, knowing when to begin snow plowing during a snowstorm can make the difference between a manageable situation and a challenging one. Lets explore the key factors that help you make this critical decision. Why timing matters for property owners Understanding when to initiate snow plowing in Fredericton is most important for both home and business owners. Poor timing can lead to dangerous conditions, property damage, and significant liability issues. For homeowners, delayed plowing can result in blocked access to emergency vehicles, difficulty getting vehicles out for work, or dangerous walking conditions for family members. Business owners face even greater challenges. Late plowing can mean lost revenue when customers can’t access your property safely. It might also create slip-and-fall hazards, leading to potential lawsuits. Additionally, packed snow from vehicle traffic becomes increasingly difficult and expensive to remove, often requiring special equipment or ice-melting chemicals. Making informed decisions about plowing timing helps maintain property value, ensures safety, and manages snow removal costs effectively throughout the winter season. How to determine the right snow plowing timing? Snow accumulation rate You need to monitor snow buildup carefully on your driveway or parking lot surface. For residential driveways, when light snow falls at less than 1 inch per hour, you can usually wait until about 2 inches accumulates before calling your plow service. This approach helps minimize service costs while maintaining accessibility to your property. For commercial parking lots, your threshold should be lower. With light snowfall, start plowing at 1-1.5 inches to ensure customer safety and prevent liability issues. Remember that vehicle traffic in parking lots can quickly compact snow, making it harder to remove if you wait too long. During moderate snowfall (1-2 inches per hour), don’t wait – contact your snow removal service when your driveway reaches 1.5 inches. For parking lots, arrange for continuous service during business hours once accumulation reaches 1 inch. This prevents snow from building up in high-traffic areas and keeps your property accessible. If you are experiencing heavy snowfall exceeding 2 inches per hour, immediate action becomes crucial. Your driveway can quickly become unusable, potentially trapping vehicles or preventing emergency access. For parking lots, heavy snowfall requires constant attention during operating hours to maintain safe conditions for customers and employees. The key is staying ahead of accumulation – it’s much easier to clear fresh snow than to remove packed or frozen layers later. Remember that these guidelines may need adjustment based on your property’s specific needs. Steep driveways might require earlier intervention, while flat surfaces might allow slightly more accumulation before plowing becomes necessary. Type of snow The type of snow falling affects how quickly you need to clear your property. On driveways and parking lots, wet, heavy snow poses significant challenges. This moisture-laden snow weighs more and can damage surfaces when vehicles drive over it repeatedly. For your driveway, tackle wet snow before it reaches 2 inches to prevent a frozen, compacted layer. In parking lots, start removal even earlier – around 1 inch – since multiple vehicles will pack it down quickly. Light, powdery snow gives you more flexibility for your property. This type is easier to clear and less likely to form ice bonds with your driveway or parking lot surface. You can usually wait until 2-3 inches accumulate on driveways, while parking lots might tolerate up to 2 inches before requiring plowing. However, keep watching accumulation rates, as even light snow can become problematic if left too long. Pavement temperature Pavement temperature plays an important role in determining your plowing schedule. When surface temperatures hover near or above freezing (32°F/0°C), snow is less likely to bond immediately with the roadway. This gives you more flexibility in your start time, and salt treatments tend to work more effectively. However, when pavement temperatures drop well below freezing, snow can quickly bond to the surface, creating a stubborn layer that becomes increasingly difficult to remove with each passing minute. Traffic pattern Your snow plowing schedule needs to align with how your property is used throughout the day. For residential driveways, focus on clearing snow before morning departure times and evening returns to ensure family members can safely enter and exit. Consider additional clearing if you expect visitors or deliveries during the day. For commercial parking lots, prioritize high-traffic zones like main entrance areas and primary parking rows. Start plowing these sections when accumulation reaches one inch, particularly during business hours when customer traffic is heaviest. Customer entrance paths and loading zones need special attention since frequent use will quickly compact snow into dangerous ice patches. Pay extra attention during peak business hours when vehicle turnover is highest, as this constant traffic can rapidly transform light snow into hazardous conditions. During continuous snowfall During extended winter storms, you will need to implement a continuous plowing strategy. If forecasts predict ongoing snowfall, you should establish a regular plowing schedule rather than waiting for specific accumulation levels. This might mean running your plows every few hours to prevent excessive buildup. Remember that continuous plowing helps prevent the formation of deep, compacted snow that becomes increasingly difficult to remove. Choose a well equipped snow removal company in Fredericton Your choice of a snow removal company in Fredericton should depend on their available resources and reliability. When selecting a contractor for your driveway or parking lot, verify they have multiple well-maintained plows and backup equipment to handle extended storms. Professional services should demonstrate they maintain their fleet regularly and keep adequate supplies of fuel and materials on hand. For residential driveways, ensure your chosen service has enough operators to provide reliable clearing during both early morning and evening hours. Commercial property owners should confirm their contractor has sufficient staff for continuous operation during business hours, with

prepare property for snow removal in Fredericton
Uncategorized

How to Prepare Your Property for Professional Snow Removal?

How to Prepare Your Property for Professional Snow Removal? Living in Fredericton means dealing with significant snowfall each winter. Whether you own a cozy home or manage commercial property, preparing for professional snow removal is crucial for maintaining safety and accessibility. With average winter snowfall exceeding 250 centimeters, having a reliable snow removal plan isn’t just convenient – it’s essential. By taking the right steps to prepare your property, you can ensure efficient service and prevent potential damage during the clearing process. Assess your property needs To determine your property’s snow removal needs, consider factors such as the size and layout of your property, the slope of your driveway or walkways, and the presence of obstacles like trees, fences, or landscaping features. These elements can impact the time and effort required for snow removal and may require specialized equipment or techniques. Also identify the areas of your residential and commercial property that are most critical for safe access. These typically include driveways, parking lots, walkways, and steps leading to entrances. Prioritize these areas for snow removal to ensure that you, your family, or your tenants can safely enter and exit the property. Get help from a Pro If your property has a complex layout or unique challenges, consider consulting with a professional snow removal company in Fredericton to assess your needs. They can provide expert advice on the best approach to snow removal, recommend appropriate equipment or products, and help you develop a customized plan for your property. Winterizing your property for snow removal Clear area Before the snow starts falling, take some time to prepare your property for snow removal. Start by removing any obstacles from your driveway and sidewalks. This will ensure that snow removal equipment can access these areas easily and safely. Secure outdoor features To protect your landscaping and outdoor features during snow removal, cover delicate plants with burlap or plastic sheeting, and store outdoor furniture or decorations in a safe place. Make sure to clear areas around sprinkler heads, as these can be easily damaged by snow removal equipment. Mark boundaries Mark the boundaries of your driveway and walkway with stakes or flags to help snow removal teams identify the areas that need to be cleared. If there are any hidden hazards on your property, such as speed bumps, drainage grates, or low-hanging branches, make sure to point these out to your snow removal provider so they can take appropriate precautions. Select a trusted snow and ice removal service When choosing a residential and commercial snow removal service, consider the following: Look for local Fredericton snow removal companies with proper insurance, verifiable references, and strong customer reviews. Prioritize services that maintain dedicated snow removal equipment and offer proof of liability coverage. Verify their business licenses and ask about their crew training procedures. Companies with established roots in Fredericton typically offer more reliable service during peak winter months. Ask about their response time after snowfall, equipment backup plans, and communication protocols. Discuss their approach to property damage prevention and their policy for marking obstacles. Inquire about their ice management strategies and the specific products they use. Request details about their storm monitoring process and how they handle service scheduling during major weather events. Maintain communication with snow removal team Effective communication is key to a successful snow removal partnership. Establish clear communication channels with your service provider, whether it’s through phone calls, emails, or text messages. Make sure you have their contact information readily available and that they have yours in case of any updates or emergencies. Keep your snow removal team informed about any changes in your schedule, accessibility needs, or specific preferences. For example, if you plan on having guests over or if there are any areas of your property that require extra attention, let your provider know in advance so they can adjust their service accordingly. In the event of any disputes or issues with your snow removal service, first try to communicate your concerns directly with the provider. Review your contract and discuss any discrepancies or misunderstandings. If the issue cannot be resolved through direct communication, consider involving a mediator or exploring other options outlined in your contract. Post snow removal property care Inspection Conduct thorough property inspections after each snow removal service. Focus on checking your landscaping and hardscaping features for any signs of damage. Look for marks on lawn edges, scrapes on concrete, displaced decorative elements, or damaged sprinkler heads. Pay special attention to areas where heavy equipment operated and spots where snow was piled. Act quickly on discovered damage Take immediate action if you discover damage from snow removal operations. Document everything with clear photos, showing the extent of damage from multiple angles. Contact your snow removal contractor promptly to report issues, and maintain written records of all communications. Review your service agreement for damage coverage terms and consider filing an insurance claim if necessary. Perform regular maintenance Maintain regular property checks between professional snow and ice removal visits. Apply ice melt products sparingly and according to manufacturer guidelines to prevent surface damage. Keep drainage areas clear of snow and ice accumulation to prevent water damage.  Address any winter-related issues quickly to prevent escalation of problems. Summary Preparing your Fredericton property for professional snow and ice removal is essential to ensure a safe and accessible environment throughout the winter season.  Assess your property’s unique needs and challenges Choose a reputable and experienced snow removal company Prepare your property by clearing obstacles and protecting landscaping Communicate effectively with your snow removal provider Inspect your property after snow removal and address any issues promptly Fredericton’s Snow Removal Experts – Atlantic Hardscape When winter hits Fredericton, Atlantic Hardscape and Concrete delivers reliable snow removal services for both residential and commercial properties, backed by 15+ years of expertise. Our crew understanding of proper hardscape protection ensures your driveways, parking lots, walkways, and decorative features remain undamaged throughout the snow removal process. Using advanced equipment and proven techniques, we clear snow thoroughly while protecting

snow removal in Fredericton
Uncategorized

How often should you clear snow during a heavy snowfall?

How often should you clear snow during a heavy snowfall? When the flakes start falling and the snow begins to accumulate, property owners face a crucial decision: how often should they clear the snow to ensure safe and accessible conditions? This question is not just a matter of convenience; it carries significant implications for preventing accidents, adhering to local regulations, and minimizing disruptions to daily life. Finding the right balance is key to navigating heavy snowfall events in Fredericton effectively. Seasonal patterns of snowfall in Fredericton Heavy snowstorms are a common occurrence in Fredericton during the winter months of December, January, February, and March. The city’s location and climate make it susceptible to significant snowfall events during this core period of the winter season. However, the timing of heavy snowfall in Fredericton can vary from year to year, depending on the specific weather patterns that influence the region. In some years, significant snowstorms may arrive earlier than December or linger later than March. This variability in the timing of heavy snow events highlights the need for Fredericton residents and businesses to stay prepared for winter weather conditions throughout the late fall, winter, and early spring months. Preparedness and adaptability are key to navigating the region’s dynamic winter climate. What impacts snow removal intervals Intensity of snowfall  The intensity of snowfall is a major factor in determining how often you should clear snow from your property. During heavy snowfall events, it’s essential to remove snow more frequently to prevent significant accumulation. As a general rule of thumb, it’s a good idea to shovel or plow every 5-8 centimeters of snowfall to keep surfaces manageable. Current temperature Temperature plays a significant role in how quickly snow accumulates and how easily it can be removed. When temperatures hover around or just below freezing, snow tends to be wetter and heavier, making it more challenging to shovel or plow. In these conditions, it’s crucial to stay on top of snow removal to prevent the heavy snow from building up and becoming even more difficult to manage. On the other hand, when temperatures are well below freezing, snow tends to be lighter and fluffier. While this type of snow may be easier to remove initially, it can still pose problems if left to accumulate over time. Cold temperatures can cause snow to drift and blow, creating uneven surfaces that are harder to clear effectively. Snow removal frequency for key areas More frequent removal Sidewalks should be cleared frequently to ensure pedestrian safety, especially during and after snowfall events. Clearing sidewalks after every significant accumulation or every few hours during heavy storms is recommended to maintain a safe path for foot traffic. Driveways also require regular clearing to maintain vehicle access, particularly during heavy storms. Removing snow from driveways multiple times throughout a significant snowfall may be necessary to prevent accumulation and ensure easy exit and entry for vehicles. For businesses, timely snow removal in parking lots is paramount to ensure safe access for customers and employees. Frequent clearing during and after heavy snowfall events prevents hazardous conditions like slippery surfaces or obstructed pathways. By maintaining clear parking areas, businesses can improve overall safety and accessibility, reducing the risk of slips, falls, and vehicle accidents during winter weather. Less frequent removal While it’s important to remove heavy snow from roofs to prevent potential damage, it’s generally not necessary to do so after every snowfall. Instead, focus on clearing snow from areas with significant accumulation or where the snow may slide off and cause issues, such as blocking entrances or damaging property. Prioritizing areas based on the level of accumulation and potential hazards is key when it comes to less frequent snow removal tasks like clearing roofs. Addressing these areas promptly can help mitigate risks and avoid costly damages. Plan effective snow removal schedule during a storm in Fredericton For Fredericton residents planning a snow removal schedule during a storm with a contractor, consider the following steps: Establish clear communication channels Clear communication channels are essential for effective coordination between the property owner and the snow removal contractor. This includes designating a primary contact person for both parties, exchanging emergency contact numbers, and determining the most efficient communication method (phone, text, or email) to relay important information promptly. Identify priority areas It’s important to identify the high-priority areas that need to be cleared first, such as main entrances, parking lots, and walkways. These areas are critical for ensuring safe access and mobility during and after a snowstorm. However, property owners should be prepared to adjust these priorities based on the severity of the storm and changing conditions. Set response timelines Setting clear response timelines is important to ensure prompt snow removal efforts. This includes establishing a time frame for the company to begin snow removal after the storm starts or ends, as well as requesting regular updates on their progress and expected completion times. These timelines help manage expectations and ensure that critical areas are cleared in a timely manner. Define service requirements To ensure effective snow removal, property owners should clearly define the service requirements with the contractor. This includes determining the plowing frequency to maintain clear surfaces, specifying areas that require salting or de-icing and the desired application frequency, and discussing the preferred snow removal methods (plowing, shoveling, or a combination) for different areas of the property. Monitor Fredericton weather  Staying informed about the latest weather forecasts and conditions in the local area is crucial for effective snow removal planning. Property owners should monitor weather updates and be prepared to adapt their snow removal schedule based on changing weather patterns, such as unexpected snowfall or temperature fluctuations that may impact the type and frequency of snow removal required. Document the agreement To avoid any misunderstandings or disputes, it is essential to document the agreement between the property owner and the snow removal company in a written contract. This contract should outline the specific services to be provided, pricing, and responsibilities of both parties. It

GET STARTED

START YOUR PROJECT THE RIGHT WAY

Your dream space is within reach as we work together from detailed 3-D designs to the final custom build. Our process is both professional and exciting, and we look forward to taking this journey with you.

Atlantic Hardscape and Concrete, your premier hardscape contractors in Fredericton, NB

Contact

34 Jackstraw Court, Fredericton, NB, Canada, New Brunswick

Scroll to Top