Want to add charm and function to your outdoor space while boosting your property’s curb appeal? A concrete stepping stone walkway might be exactly what you need. These versatile pathways guide visitors through your garden, connect different areas of your yard, and create visual interest without the commitment of a continuous poured path.
Concrete stepping stones offer durability that natural stone can’t always match, especially in Atlantic Canada’s challenging freeze-thaw climate. They’re customizable, cost-effective, and surprisingly straightforward to install when you understand the fundamentals. Whether you’re a Fredericton homeowner planning a weekend project or a property manager evaluating renovation options, knowing how to create a proper concrete stepping stone walkway ensures your investment lasts for years.
This guide walks you through the materials, tools, installation steps, and maintenance practices that make the difference between a walkway that settles beautifully into your landscape and one that cracks, shifts, or disappoints within a season.
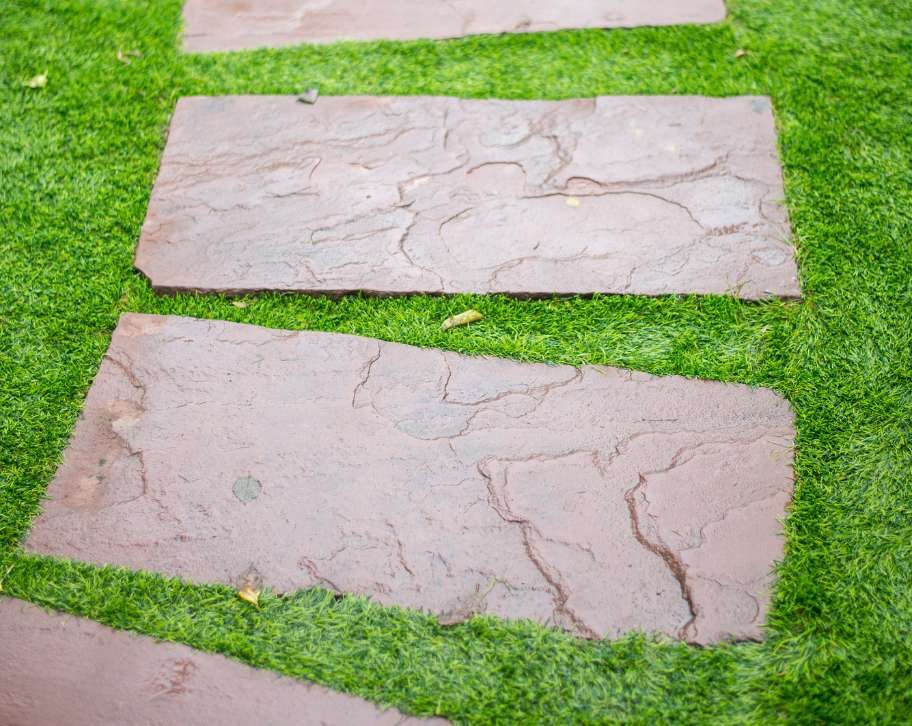
Building a durable concrete stepping stone walkway starts with gathering the right materials and tools. The foundation materials are just as important as the stones themselves, particularly in regions with freeze-thaw cycles.
Precast vs. cast-in-place stepping stones
You have two main options for the stones themselves. Precast concrete pavers are manufactured in controlled environments, ensuring consistent strength and colour. They’re ready to install immediately and come in various shapes like round, square, and flagstone-style patterns. Cast-in-place stones involve pouring concrete into forms directly on-site, allowing complete customization of size, shape, and finish. This method takes longer due to curing time but offers unique design possibilities.
Criteria | Precast Pavers | Cast-in-Place Stones |
|---|---|---|
Customization | Limited to available shapes and sizes | Fully customizable shapes and dimensions |
Installation Speed | Immediate placement after base prep | Requires 24-48 hours curing before use |
Durability | Factory-controlled high density | Depends on proper mixing and finishing |
Cost | Higher material cost, lower labour | Lower material cost, higher labour |
Texture Options | Pre-finished surfaces | Custom broom, exposed aggregate, or salt finishes |
Foundation and base materials
The sub-base prevents frost heave and keeps your walkway level over time. You’ll need geotextile landscape fabric to separate the native soil from your base layer. This prevents the materials from mixing and maintains proper drainage.
A crushed stone base (3/4-inch minus) forms the structural foundation. Plan for a 4-inch layer, compacted in 2-inch lifts for maximum stability. Top this with a 1-inch layer of coarse bedding sand for fine-tuning each stone’s level.
Essential tools for installation
Excavation requires:
Square-point shovel for digging
Measuring tape to mark your layout
Plate tamper for compacting base layers
Rubber mallet to tap stones into place
4-foot level to check alignment across multiple stones
String lines and stakes to maintain straight edges for formal layouts
Joint filler options
The gaps between stones define your walkway’s character. Decorative pea stone or river rock provides excellent drainage and a natural look. Polymeric sand works for tight-joint designs, hardening when misted to prevent weed growth and lock stones in place.
Ground covers like creeping thyme create a softer appearance but require regular trimming. Cedar mulch offers a woodland aesthetic at lower cost, though it needs replenishment every few years.
Texture for slip resistance
Safety matters, especially in wet or icy conditions. For cast-in-place stones, apply a broom finish by dragging a stiff broom across the surface before it fully cures. Exposed aggregate reveals the stone within the concrete mix, providing excellent grip. A salt finish involves broadcasting rock salt onto wet concrete and washing it away after curing, leaving a textured surface ideal for barefoot traffic.
Proper installation determines whether your walkway lasts a decade or fails within a season. Follow these steps for professional results that withstand Atlantic Canada’s climate challenges.
1. Plan your layout and spacing
Walk the intended path naturally and mark where your feet land. This creates an intuitive flow. Space stones 20 to 24 inches apart, measuring centre to centre. This matches the average adult stride. Use spray paint or stakes to mark each stone’s position before excavating.
For curved paths, lay out a garden hose to visualize the route. Adjust until the curve feels natural. Formal walkways benefit from string lines to maintain straight edges.
2. Excavate to proper depth
Dig out each stone location to a depth of 6 to 8 inches. This accommodates your 4-inch base layer, 1-inch sand layer, and the stone thickness while keeping the finished surface at the desired height.
Compact the native soil at the bottom of each hole using a hand tamper or plate compactor. Loose soil leads to settling over time.
3. Install geotextile fabric and base layer
Cut pieces of landscape fabric slightly larger than each hole. This prevents the crushed stone from mixing with clay soil beneath.
Add crushed rock in two 2-inch layers, compacting each thoroughly before adding the next. Proper compaction is critical. The base should feel solid underfoot, not spongy.
4. Add the bedding sand layer
Spread 1 inch of coarse sand over the compacted base. This layer allows fine adjustments to level each stone perfectly. Avoid using fine play sand, which doesn’t provide adequate support.
5. Set and level each stone
Place the first stone and tap it gently with a rubber mallet to settle it into the sand. Check for level in multiple directions. If one edge sits high, lift the stone and remove sand beneath that spot. If it sits low, add sand.
Work outward from your starting point, checking level across adjacent stones as you go. Stones should sit flush with surrounding grade if bordered by lawn, or 1 to 2 centimetres above grade if surrounded by mulch or gravel.
6. Fill the joints
Once all stones are set and level, fill the gaps with your chosen material. For pea stone, pour it between stones and sweep excess off the surface. For polymeric sand, sweep it into tight joints and mist lightly with water to activate the binding agents.
If planting ground cover, fill joints with quality topsoil and plant plugs or seeds according to the species’ requirements.
Maintenance extends your walkway’s lifespan and preserves its appearance through Fredericton’s demanding seasonal changes.
Sealing protects against moisture damage
Apply a penetrating sealer every 2 to 3 years. This prevents water from entering the concrete’s pores, where it can freeze and cause spalling (surface flaking). Choose a breathable sealer that allows moisture vapour to escape while blocking liquid water.
For decorative finishes like stamped or coloured concrete, a film-forming sealer adds protection and enhances colour. Reapply according to manufacturer recommendations, typically every 3 to 5 years.
Annual cleaning prevents buildup
Pressure wash your walkway each spring to remove winter grime, moss, and lichen. In shaded areas, organic growth accelerates. While some homeowners appreciate the aged look, excessive moss holds moisture against the concrete and should be controlled.
Use a fan tip on your pressure washer and maintain consistent distance to avoid etching the surface. For stubborn stains, a concrete cleaner applied before pressure washing improves results.
Winter care prevents chemical damage
Rock salt (sodium chloride) accelerates freeze-thaw damage, especially during the first year after installation. Use calcium chloride or sand for traction instead. Sand provides grip without chemical interaction.
When shovelling snow, use plastic-bladed shovels to avoid scratching decorative finishes. Set snowblower skids high enough to clear the surface without catching stone edges.
Inspect and repair seasonally
Check your walkway each spring and fall for cracks, shifting, or settling. Small cracks can be filled with concrete repair caulk before they expand. If a stone has settled or tilted, lift it, adjust the base material, and reset it properly.
One advantage of stepping stone walkways is that individual stones can be replaced without disturbing the entire path. If a stone cracks beyond repair, remove it, prepare the base, and install a new one.
Long-term performance expectations
With proper maintenance, a professionally installed concrete stepping stone walkway lasts 10 to 15 years in Fredericton’s climate. The combination of quality materials, correct installation depth, and regular sealing protects your investment through countless freeze-thaw cycles.
“The difference between a walkway that lasts and one that fails comes down to what you can’t see. A properly compacted base with adequate drainage is worth every extra hour of preparation.” Ryan Clark
Creating a concrete stepping stone walkway involves more than arranging stones on the ground. Proper sub-base preparation, drainage planning, and material selection determine whether your walkway performs beautifully for years or requires costly repairs within seasons.
Atlantic Hardscape and Concrete brings over 15 years of experience working specifically with Fredericton’s clay soils and freeze-thaw climate. Our team understands exactly how deep to excavate, which base materials provide proper drainage, and how to integrate your walkway seamlessly with your existing landscape.
We offer custom walkway design with 3D renderings so you can visualize your project before any work begins. From selecting the right paver style and finish to ensuring proper slope for drainage, we handle every detail that determines long-term performance.
Contact Atlantic Hardscape and Concrete for a consultation. We serve Fredericton and surrounding communities including Oromocto, New Maryland, Hanwell, and Keswick with professional hardscape installation that stands up to Atlantic Canada’s demanding climate.
Space stepping stones 20 to 24 inches apart, measuring from centre to centre. This matches the average adult stride and creates comfortable walking. For high-traffic areas or accessibility needs, place stones closer together to accommodate shorter strides or mobility aids.
Placing stones directly on grass leads to sinking and uneven surfaces as the soil compacts and shifts. Proper installation requires excavating to accommodate a compacted gravel base and bedding sand layer. This foundation prevents settling and frost heave in freeze-thaw climates.
Residential stepping stones should be at least 2 to 4 inches thick for pedestrian traffic. Commercial applications or areas with heavier use benefit from thicker stones (4 inches or more) and may require reinforcement with fibre mesh or rebar to prevent cracking under load.
Use polymeric sand for tight joints between stones. When misted with water, it hardens and prevents weed seeds from germinating. Installing geotextile fabric beneath the base layer provides an additional barrier. For wider gaps, landscape fabric topped with decorative stone suppresses weed growth effectively.
Set stones flush with the ground if surrounded by lawn, allowing mowers to pass safely over them. If bordered by mulch or gravel, raise stones 1 to 2 centimetres above grade to prevent debris from washing over the surface during rain.
Poured concrete reaches initial set in 24 to 48 hours, allowing light foot traffic. Full curing to maximum strength takes approximately 28 days. Avoid heavy loads or sealing the surface until curing is complete for best long-term performance.
GET STARTED
Your dream space is within reach as we work together from detailed 3-D designs to the final custom build. Our process is both professional and exciting, and we look forward to taking this journey with you.
Contact
34 Jackstraw Court, Fredericton, NB, Canada, New Brunswick
